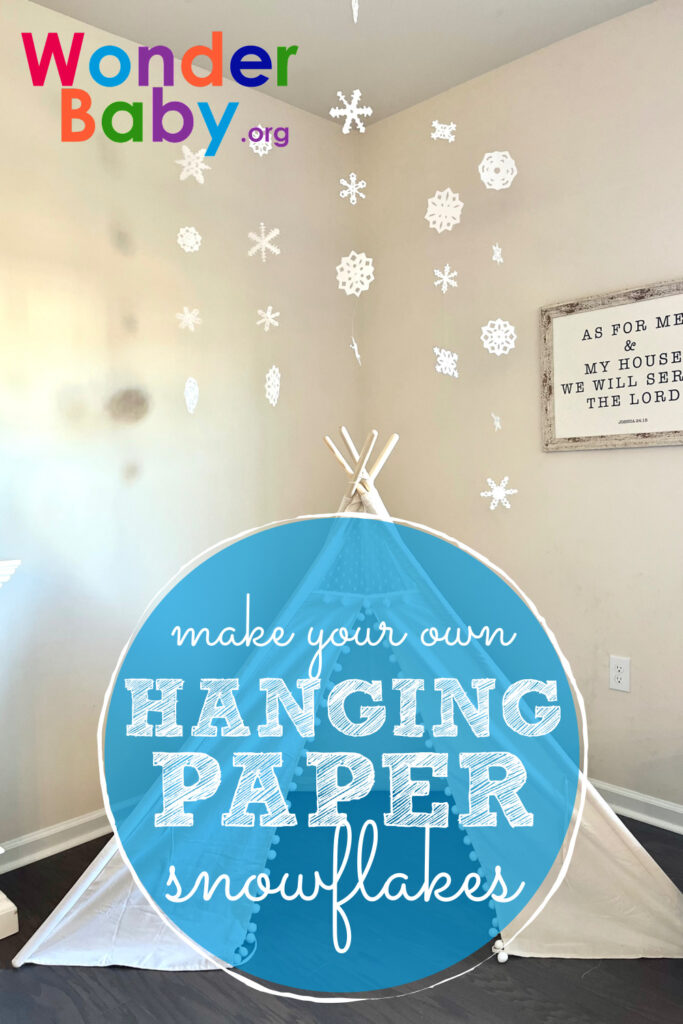
Hanging Paper Snowflakes
This post may contain affiliate links; please see our terms of use for details.
Snow season is upon us—like it or not. Some of us are delighted at the thought of delicate snowflakes kissing our noses. Others cringe at bundling their children in 23 layers just to go outside.
No matter your feelings about winter and snow, this craft is one both snow lovers and snow leavers can enjoy. Paper snowflakes are frost-free and don’t require any shoveling for cleanup. And your kids won’t get soggy mittens and frozen fingers from making them.
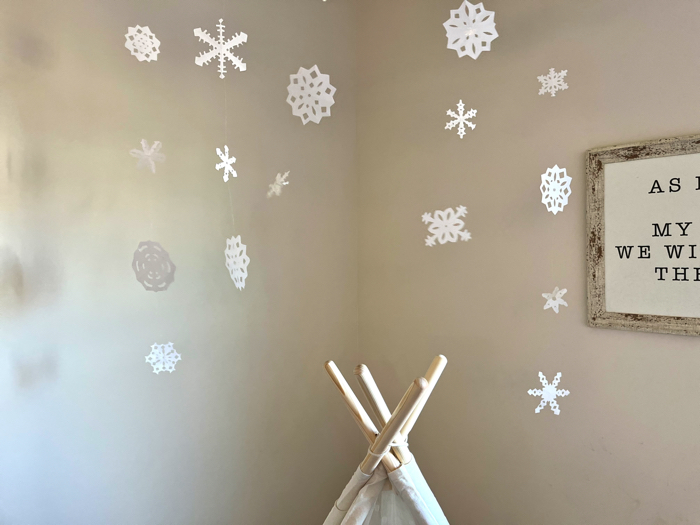
My five kids love snowy weather and couldn’t wait to turn our living room into a snowy wonderland. With scissors in all sizes and pre-folded paper, we made as many snowflakes as our hands could stand. The result—well, let’s just say it was enough to shock my husband when he got home from work and send the kids in an uproar of laughter.
We hope these Hanging Paper Snowflakes will bring a little joy into your home during these cold winter months. It might even spur on a friendly indoor snowball fight or a hot chocolate family night. Get ready to transform your home into a magical snow land.
Hanging Paper Snowflakes: What You’ll Need
Paper snowflakes are a joy for children to make. With only a piece of paper and a pair of scissors, you can create an unlimited amount of designs. Here’s all you need to make this beautiful craft:
Materials:
- White paper
- Scissors
- Fishing line
- Mounting putty
Setup:
To make this a simple craft for all family members, it’s helpful to have a few things ready beforehand.
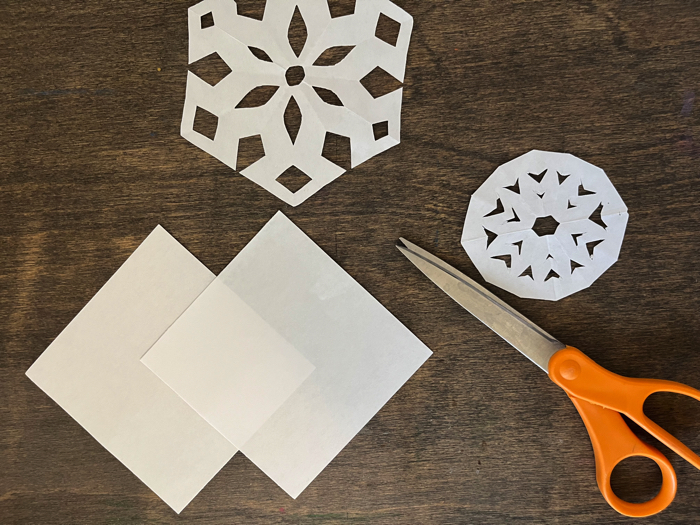
Cut Paper
Trim down a sheet of white paper until it’s a perfect square. The size of the square you make will determine the size of the snowflake.
My older girls loved the 4×4 squares that made small snowflakes. My younger children needed a larger size closer to 6×6 so they could cut easily. You can also take a standard 8.5×11 piece of paper and make it into an 8.5×8.5 square. If you want to get really fancy, origami paper is already cut to square and comes in beautiful patterns and colors, although the prettier ones (like this gold foil paper) can be costly.
I made around ten squares per child in advance. This kept the project moving along without having to stop to cut paper. It also gave us plenty of snowflakes to hang from the ceiling.
Fold Squares
For younger children, you’ll want to go a step further. Pre-fold the paper and secure it shut with a paperclip.
The folding can be a bit tricky for tiny hands. Having the paper already folded will allow them to just design and cut. Even if they aren’t able to make all of the cuts, practicing with scissors is still a great fine motor activity for preschoolers.
Make Examples
Make a few examples of snowflakes. You might also mark cut lines on a few folded squares. This will give your children some vision and ideas for how to get started.
Time to Craft
When you’re ready to cut the snowflakes, guide your children through these instructions.
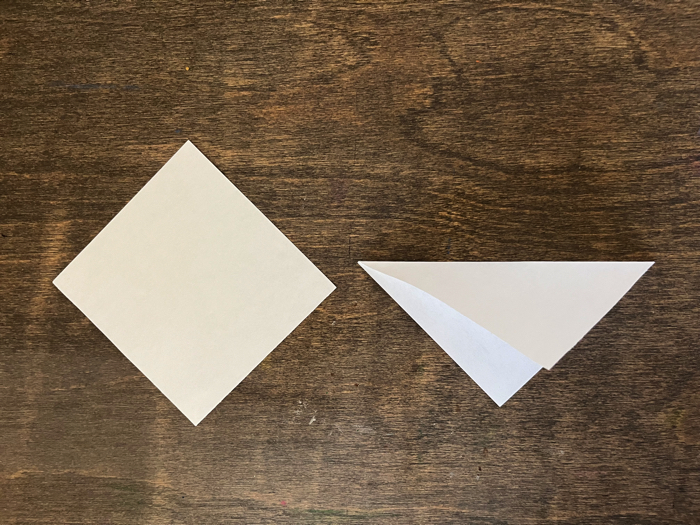
Step 1: Lay the paper on a flat surface in front of you. If you haven’t already cut it into a square, you’ll want to do that now.
Step 2: Fold the paper in half to make a triangle.
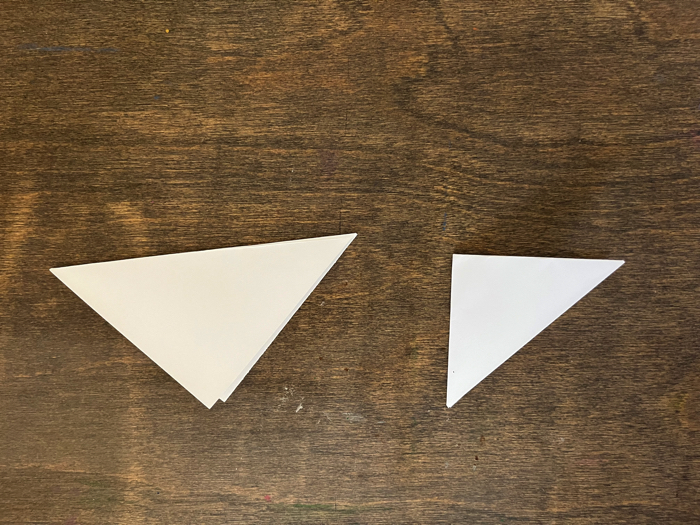
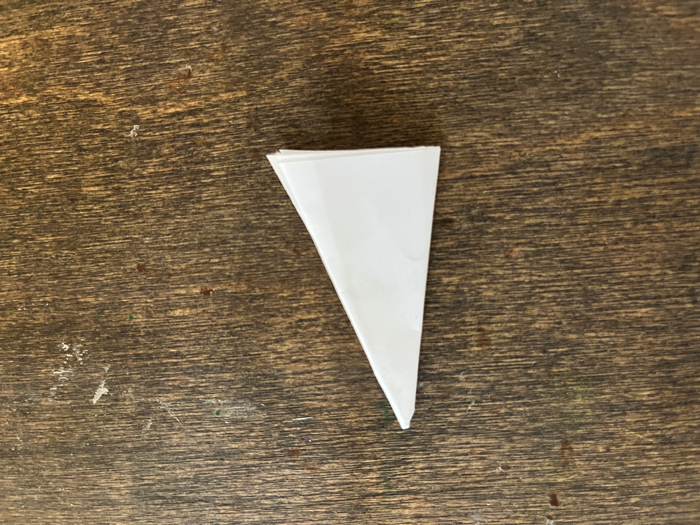
Step 3: Fold the triangle in half so that the two corners at the end of the line meet.
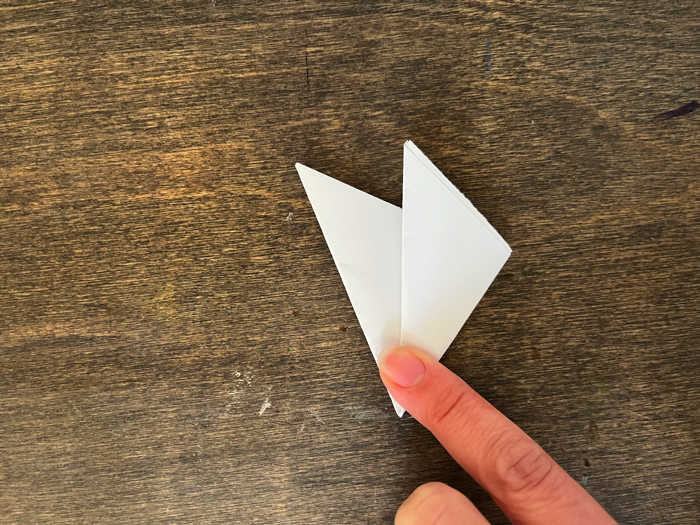
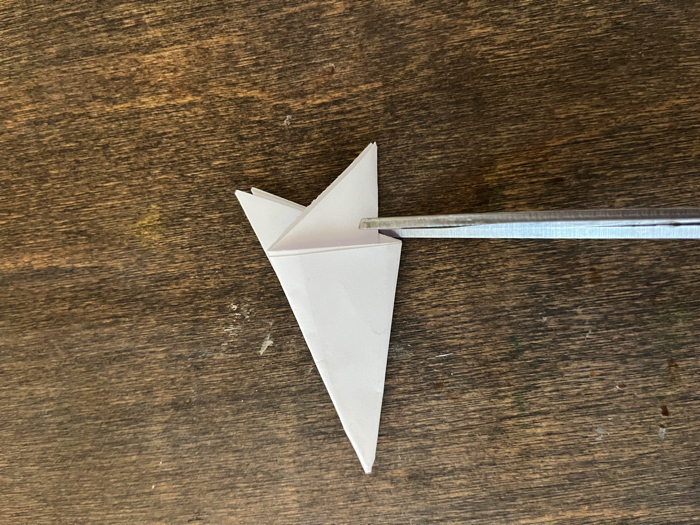
Step 4: Fold the triangle into thirds by overlapping the lefthand corner and then the righthand corner. You should see an arrow shape with two pointed corners at the end.
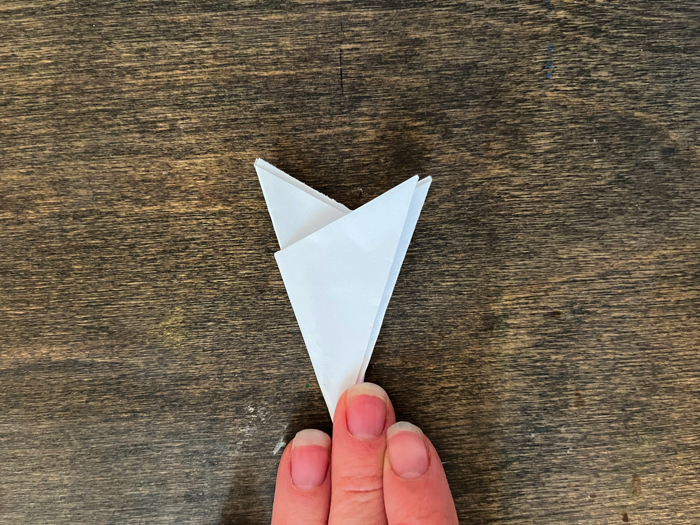
Step 5: Cut off the two pointed corners to create a straight line.
Step 6: Draw cut lines on the paper. Remember, the folded edge of the snowflake holds it all together. Be sure to not cut too much off on this side.
Help your child create designs and cut as needed. Remind them that all snowflakes are different and that there’s no such thing as a “perfect snowflake.”
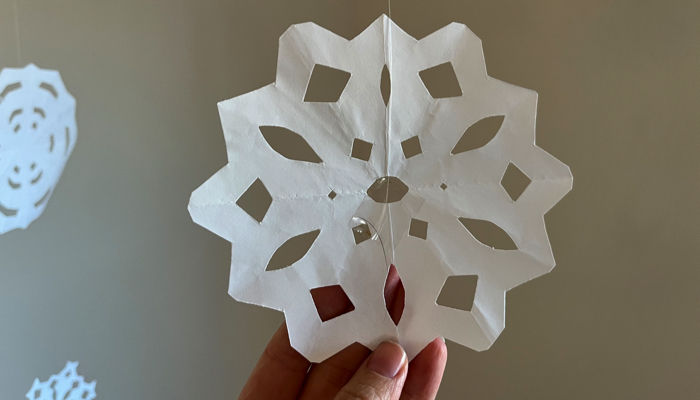
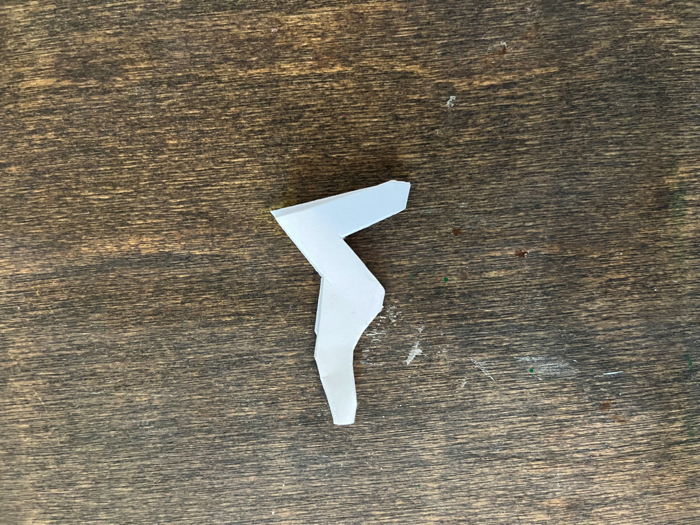
Step 7: Open the folded paper and reveal your snowflake design. You can refold the paper and tweak the cuts if needed.

Step 8: Cut a piece of fishing line and attach the snowflakes using a dab of hot glue, a piece of clear tape, or some mounting putty.
Step 9: Attach the end of the fishing line to the ceiling using the mounting putty.
How to use Hanging Paper Snowflakes for Pretend Play
If your children are anything like mine, these paper snowflakes may inspire them to play a wintery game. Here are a few winter pretend play games to go along with snowy scenery:
Indoor Campfire

- Realistic Appeal: if you are planning for a camping themed party, our fake campfires can be nice choice; Designed to mirror a real campfire, Your guests will be amazed at how realistic these fake campfires look, even in dim light
- Lifelike Bright Colors: our package comes with 2 set campfire centerpiece embellished with bright realistic colors, this campfire delivers a vibrant and realistic appeal, making it an ideal piece for your party decor, significantly enhancing your party’s aesthetics
- Reusable and Durable: these 3d campfires can serve year after year thanks to the quality cardboard materials and waterproof design
- Function: the campfire cardboard is ideal for people to play in their tent to create a stimulate imaginative play
Using a teepee, reading canopy, or blanket fort, create a camping area. We used a reading teepee we have in our living room and added some soft pillows for sitting on.
Next, create a pretend campfire and provide marshmallows and sticks. Get creative with the campfire. You can use toilet paper rolls for logs, red tissue paper for fire, and battery power candles for special effects.
Have your children pretend they’re explorers in the forest during winter. They’ll need to create a campfire and make beds to keep warm. Lucky for them, Mom packed marshmallows in their backpacks!
Indoor Snowball Fight
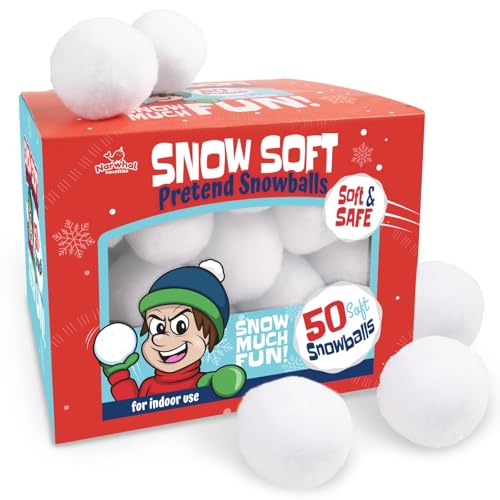
- Package Includes 50 Pack of 2 Inches Soft White Balls, Snowballs Packed in a Gift Ready Box with a Drawstring Bag Making it a Perfect Gifting Option for Holidays, Birthdays or Winter Parties
- Snowball Winter Toys are Made of Soft and Safe Plush Material, Snow Toys are Durable and Reusable Suitable for All Ages Providing Fun Playtime for Kids Ages 4-8, 8-12 Teens and Adults Indoors or Outdoors
- Best Artificial Snow, Perfect for Christmas Games for Kids, Celebrations, Winter Parties, Carnivals, Halloween, Games or Festive Snow Indoor Decorations Creating Joyful Moments with Family and Friends Anytime Anywhere
- Ideal as Stocking Stuffers for Kids or Christmas Stuffers, Indoor Snowball Fight Set, Toss Game as these Snowballs Bring Smiles to Everyone and even Great for Classroom Gifts, Office Parties or Family Holiday Surprises
Using cotton balls, rolls of toilet paper, or rolled-up socks, create soft “snowballs.” Fill two laundry baskets with the snowballs and separate your family members into teams. Have fun launching snowballs into the other team’s camp.
You’ll likely want to set rules before playing so no rough play occurs. We always tell the kids not to throw at faces. We also remove breakable decorations from the play area.
Artificial Snow
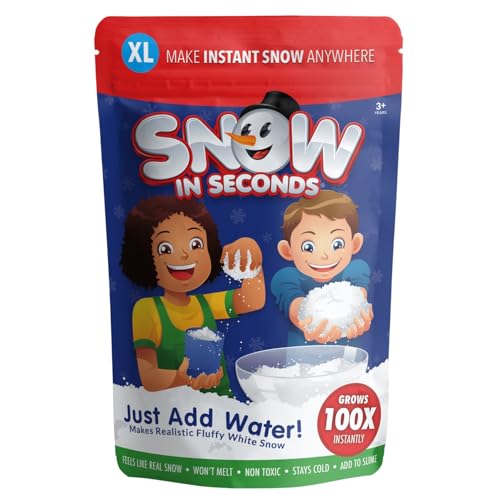
- XL Bag will cover a 3×4 foot area (12 square feet) with 1 inch deep of snow
- Just add water – Grows instantly 100x its size
- Long Lasting – Will Not Melt
- Looks and Feels like real snow! – Even cold to the touch!
Using just a few ingredients, you can create a fluffy substance that mimics snow but without the cold. Artificial snow also makes a fantastic ingredient for a sensory snow table. You can add a variety of items to the snow for play, such as woodland animals, miniature trees, ice cubes, or tiny mirrors for ponds.
What else can we add to these Hanging Paper Snowflakes?
To dress up the paper snowflakes, try adding glitter on the paper or beads on the strings. You can also hang white streamers or paper icicles from the ceiling. Twinkle lights on the wall would make the room extra fun and magical.
What skills or concepts does this activity teach?
Just about every year I’ve homeschooled my children, we’ve made paper snowflakes. There are plenty of ways you can use them to develop skills and introduce new concepts. Here are a few of my favorite educational uses for paper snowflakes:
Symmetry
Snowflakes naturally lend themselves to a symmetry lesson. As your child unfolds their creation, they’ll be amazed at how the snowflake looks the same all the way around. Extend the learning by showing them the line of symmetry down their face or through the middle of an apple.
Creativity
Snowflakes can not be made incorrectly. This opens up a wide door of opportunities for creativity. Your child can experiment with different cuts and folds and see what happens.
Fine Motor Skills
Folding and cutting are two ways to help develop your child’s fine motor skills. For proper development, your child needs coordination and strength with both small and big muscle movements.
There’s a big difference between fine and gross motor skills. Fine motor skills are sharpened when your child uses their fingers to pinch, grab, fold, cut, etc.
What other ways can I enrich this activity?

- Shulevitz, Uri (Author)
- English (Publication Language)
- 32 Pages – 10/06/2004 (Publication Date) – Square Fish (Publisher)
Don’t stop the fun! Add in any of these snow-themed activities to keep the learning going:
- Do some finger painting to make a snowman
- Make sparkle snowball cookies
- Read the book Snow by Uri Shulevitz
- Make a snowflake sensory bag
- Introduce your kids to folding origami
Related Posts

Tactile Arts and Crafts, Visual Impairment
What Does Art Feel Like? A Guide to Tactile Creativity for Blind Children
Discover how blind children explore art through touch. Learn practical ways to support tactile creativity, build early Braille literacy, and nurture imagination with hands-on projects, textures, and accessible art experiences.

Holiday Crafts and Ideas
Sensory Pumpkin Decorating for Kids Who Are Blind
Create a sensory pumpkin with yarn, buttons, and fabric! A fun, non-carving fall craft for blind kids that builds tactile and fine motor skills.

Holiday Crafts and Ideas
5 Accessible Thanksgiving Crafts for Kids Who Are Blind or Visually Impaired
Celebrate Thanksgiving with five accessible, sensory-rich crafts for kids who are blind or visually impaired.