Switch-Accessible Smoothie Activity For Special Needs Kids

This post may contain affiliate links; please see our terms of use for details.
- Switches allow your child to be more involved in play and self-care at home.
- Switches should be easy for your child to activate, so try different shapes or sizes and look at different placement options until you find the right match.
- Switch play can include interacting with online switch activities, activating musical toys, or even controlling kitchen appliances like blenders.
Remember back in 2020 when schools went to virtual learning? That was incredibly difficult for most families, but kids with significant special needs were hit especially hard. Sure, teaching math via zoom is complicated, but what about physical therapy or speech therapy?
Many of our creative special education teachers found ways to bring the classroom home for their students, and in our case we were introduced to the wonderful world of switches. Ivan’s speech therapist dropped off a box full of Big Macks, Jelly Beans, and Candy Corn – and no, I’m not talking about snacks!
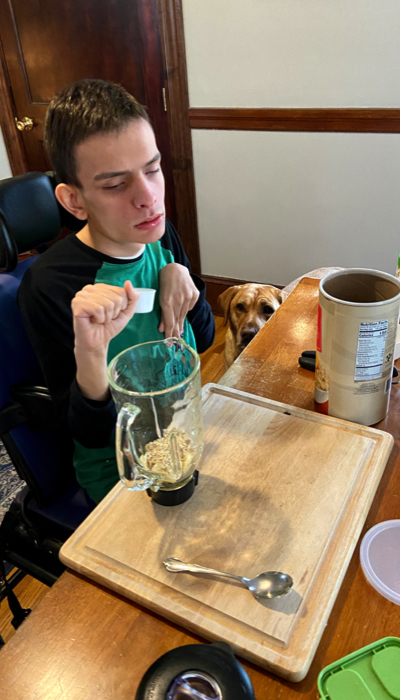
Our TVI (Teacher of Students with Visual Impairments) developed a weekly virtual multi-sensory cooking class that included hands-on activities incorporating communication switches and switch-activated tools. Ivan’s favorite activity was making smoothies, so we became smoothie experts!
Here are our tips for making the most of your accessible switches when cooking in the kitchen with your special needs child.
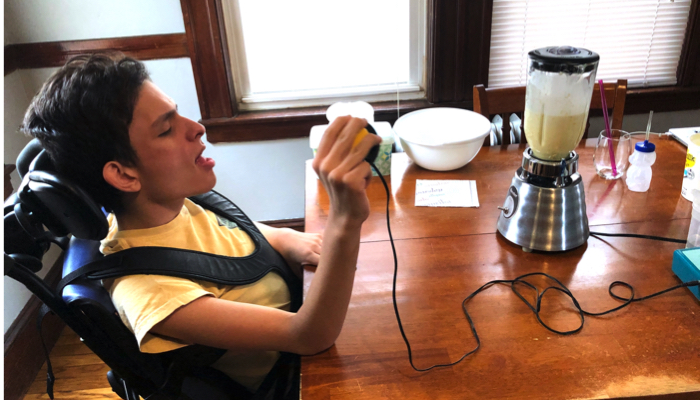
What Is a Switch?
Switches usually look like big buttons that your child can press to activate a toy or play a recorded message. Contact switches require physical contact (like pressing a button or pushing a joystick), while non-contact switches may be operated through eye movement or blowing in a tube.
Most special education settings will provide contact switches in multiple shapes, sizes, and styles, so you should have access to many different types of switches. If your school has Assisted Technology (AT) or Augmentative and Alternative Communication (AAC) departments, check in with them to see what is available.
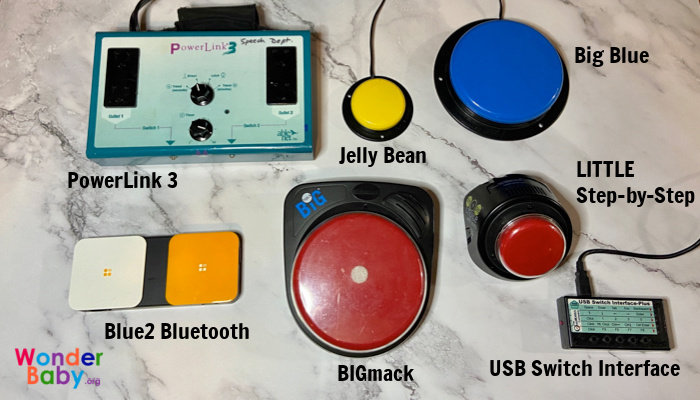
Different Types of Switches
Switches are available in a variety of styles and sizes. Some switches include:
- BIGmack switch: This is a basic recordable communication switch that you can find in most special needs classrooms. It is battery-operated and can record one message up to two minutes long.
- Big Red (or Blue, Green, Yellow) switch: This switch gives your child a large five-inch space to activate, making it a good choice for kids who are visually impaired or have limited strength. It connects via a plug to other devices, so it can be plugged into smaller communication switches, like the little step-by-step.
- Jelly Bean switch: The jelly bean is similar to the Big Red in that it plugs into other devices, but it is a much smaller switch. We like this one because it can be held in one hand and activated with a simple pinch.
- LITTLE Step-by-Step switch: This switch is battery-operated and recordable. It allows you to record up to 3 different messages that will play in order when your child activates the switch. You can also find a larger step-by-step switch.
- Blue2 Bluetooth switch: We use this switch to activate games on our iPad. For example, you can set this switch to allow you to turn pages in the Pictello App.
- Stick switch: Ivan uses this switch at school connected to a LITTLEmack with recorded phrases. Ivan prefers using the toggle-style switch and his speech therapist added foam and texture to the handle to make it easier to find and more engaging to touch.

There are also many accessories used with switches to connect them to your computer or iPad or to allow for switch-activated toys or tools. Some of these accessories are:
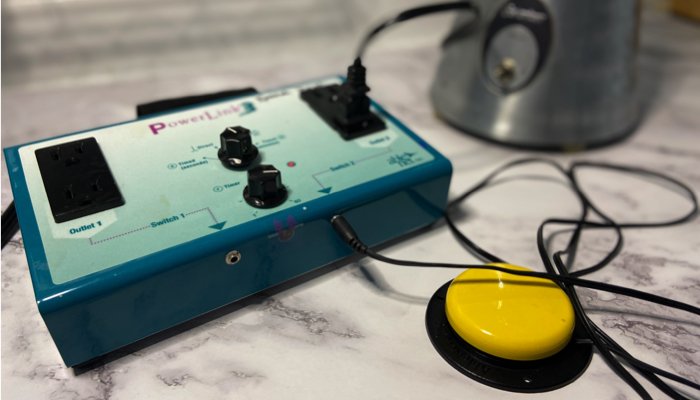
- PowerLink 4: We have the PowerLink 3, but the updated version works similarly. This connector allows you to plug in anything that requires a standard outlet (think fans, blenders, stereos, etc) and turn them into switch-activated devices.
- USB Switch Interface: This USB interface allows you to plug the interface into your computer and a switch into the interface, turning your computer into a switch-activated device.
- Modular Hose: Modular hose is a great flexible material that offers almost endless mounting options for your switches!
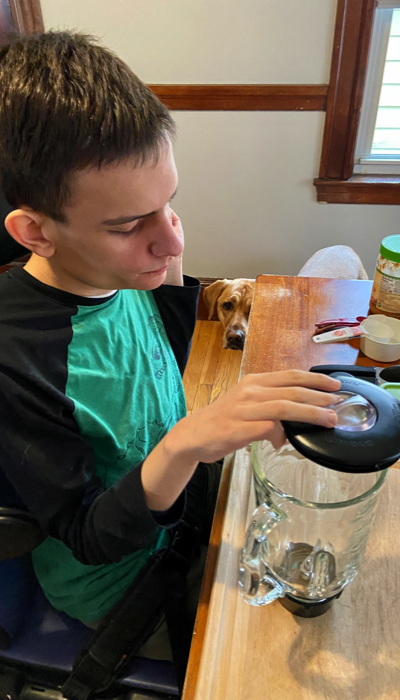
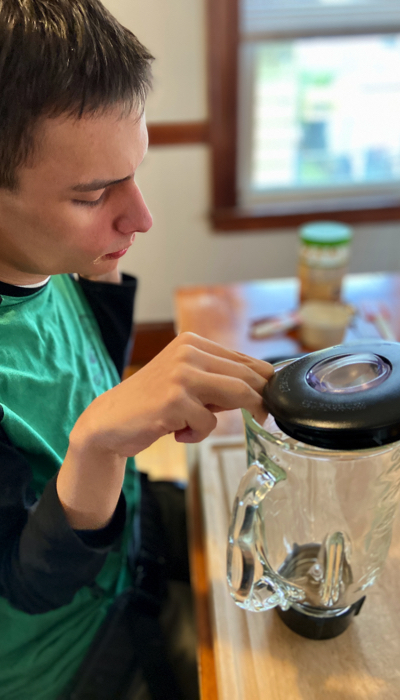
4 Tips for Making Switch-Accessible Smoothies
Once you have your perfect switch set-up, it’s time to connect that switch to your blender and make some smoothies!
1. Make It Easy
Before we begin our activity, I make sure we have all our ingredients, measuring cups, and tools set out beforehand. Read through your recipe and prepare any foods if necessary. For example, some recipes may call for frozen or peeled fruit.
If your child can assist with peeling or chopping, then definitely let them help! For kids who are better at working with pre-chopped ingredients, then have those tasks already done and ready for the next step.
Make clean up easy for yourself by laying down a mat or having your child wear an apron or bib.
2. Make It Multisensory
Cooking is our favorite multisensory activity! Encourage your child to touch, taste, and smell. Feel the sticky banana versus the smooth measuring spoon. Smell the cinnamon and taste test that chocolate syrup. Be prepared for messes and promote messy play. Getting your hands in your food can be a great way to learn about the world!
3. Make It Accessible
This is where your switches come into play. We use a Power Link 3 connected to a Jelly Bean Switch to allow Ivan to turn on the blender by himself. We use a Big Mack switch to record messages like “that’s my choice!” and we let Ivan choose ingredients or flavors.
Check out the video below for a quick overview of how we connect our blender to a switch:
4. Make It Tasty
Find interesting recipes that are in line with your child’s likes. Try new flavors when your child is comfortable with new things, but be prepared for some bad smoothies! We wanted to do something different over the holidays and tried this Warm Wassail Smoothie. It was definitely not a favorite, but that’s ok because we still enjoyed the process and now we know what we like and don’t like.

Our 5 Favorite Smoothie Recipes (So Far)
Below are recipes for our favorite smoothies so far. We are always trying new things and experimenting with flavors. Adjust these recipes to fit your child’s preferences or dietary restrictions.
All of these recipes are really easy to make. Simply throw the ingredients in the blender, hit that accessible switch, and blend until smooth. Ivan also has dysphagia and can only drink thickened liquids, so all of our recipes are pretty thick. Add more milk or milk substitute for thinner smoothies.
1. Oatmeal and Pear Smoothie
- ½ cup Chopped Pear
- ¼ cup Rolled Oats
- ½ teaspoon Cinnamon
- ¼ teaspoon Honey
- ½ cup Greek Yogurt
- ¾ cup Milk

2. Banana Cream Pie Smoothie
- 2 Bananas (sliced and frozen)
- ⅓ cup Greek Yogurt
- 2 teaspoons Vanilla Extract
- 1 cup Milk
- 4 Vanilla Wafer Cookies
- 1 ½ tablespoons Honey
- ¼ teaspoon Nutmeg
- ½ teaspoon Cinnamon
3. Pumpkin Pie Smoothie
- 1 cup Pumpkin Puree
- 1 Banana
- 1 cup Milk
- 1 tablespoon Honey
- ½ teaspoon Vanilla Extract
- 1 ¼ teaspoons Pumpkin Pie Spice

4. Coconut Chocolate Smoothie
- ½ Banana
- ¼ cup Oats
- 1 tablespoon Peanut Butter
- 1 teaspoon Cocoa Powder
- 1 tablespoon Shredded Coconut
- 1 tablespoon Maple Syrup
- ½ teaspoon Vanilla Extract
- 1 ¼ cups Coconut Milk
5. Oatmeal Raisin Cookie Smoothie
- 1 cup Greek Yogurt
- ½ cup Milk
- ⅓ cup Oats
- 1 teaspoon Honey
- ½ teaspoon Cinnamon
- ½ teaspoon Vanilla Extract
- 1 tablespoon Raisins
FAQs
Where can I get a switch for my special needs child?
If your child is in a special needs school or classroom, you should be able to ask them for a switch or two that can be sent home. You can also request a referral to meet with an Augmentative and Alternative Communication (AAC) program at your local children’s hospital. It is possible to get switches paid through insurance, but that will depend on your coverage.
How do I incorporate switch use into our daily routine at home?
Consider using switches with games or recreational activities your child enjoys at home. Cause and effect toys, accessible iPad apps, or musical devices are all great options for switch play.
Switches can also be incorporated into your child’s self-care routine. Switches can be used to turn on a food processor or toaster in the kitchen or a hair dryer in the bathroom. Anything that is plugged in can potentially become a switch-activated tool!
Communication switches can be used throughout the day at home, too. You can use switches for simple responses like “more, please” or “it’s my turn” while feeding or playing games. Recordable switches can also be used to create talking to-do lists or daily schedules.
Are there inexpensive alternatives to these expensive switches?
You may have noticed that these switches aren’t cheap! Unfortunately, as with most special needs equipment, switches can be very expensive. There are simpler and less expensive alternatives available, though. For example, you can get a set of four Recordable Answer Buzzers from Learning Resources for only about five bucks per switch. We have used these in the past and they don’t last very long, but at this price they are fairly easy to replace when needed.
If your child is visually impaired, you can also talk to your TVI about using quota funds to purchase switches.

Related Posts

Eye Conditions and Syndromes, Visual Impairment
Neuralink Announces Plans to Restore Sight to the Blind with Brain Chip
Elon Musk’s company Neuralink has announced plans to begin human trials of its new “Blindsight” brain chip by the end of 2025.

Special Needs
5 Spring Cleaning Tips for Families of Children with Disabilities
Spring cleaning is an opportunity to create a more accessible, organized, and supportive space for your child with disabilities. Declutter, deep clean, and refresh!

Visual Impairment
The Gift of Understanding: How a Young Child Helps His Blind Father Navigate Life
When a parent is blind, it’s natural for people to wonder how their sighted child will adapt. Will they struggle to understand their parent’s needs? Will they feel burdened by...