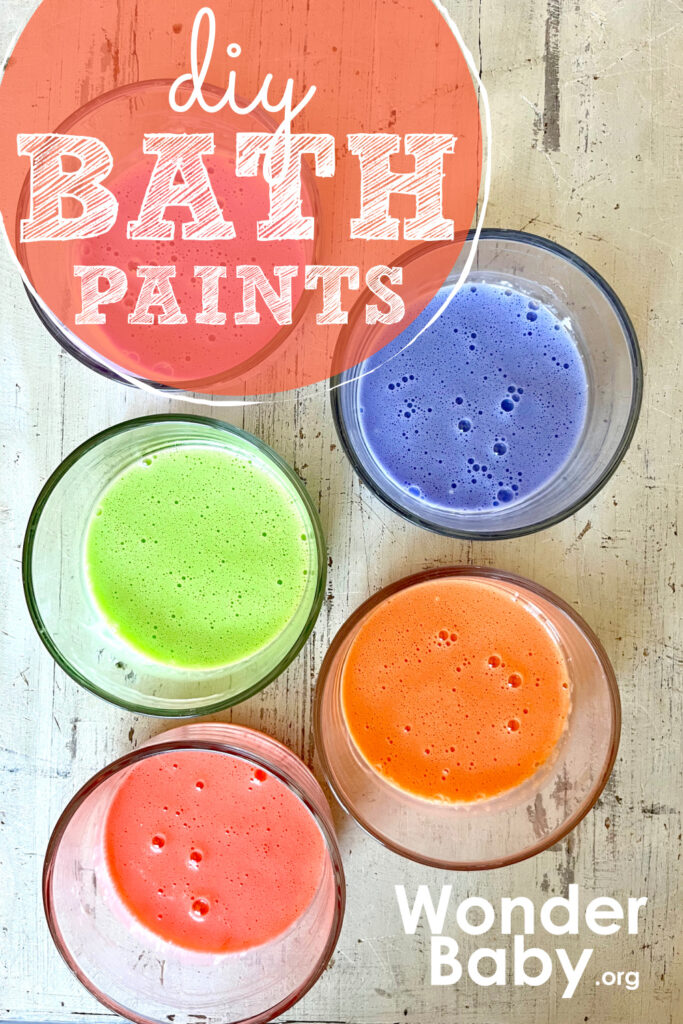
DIY Bath Paints

This post may contain affiliate links; please see our terms of use for details.
Bathtime has always been a favorite time of day for my five children. They look forward to playing in the tub at the end of a long day. I often fill the tub with their favorite bath toys and bubbles and let them play until bedtime.
Over the years, we’ve found different ways to make bathtime more fun. Some of our favorite ideas have included a glow-party bath using glowsticks in the dark and a color surprise bath using fizzy bath color drops. However, my kids’ absolute favorite has always been bath paints.
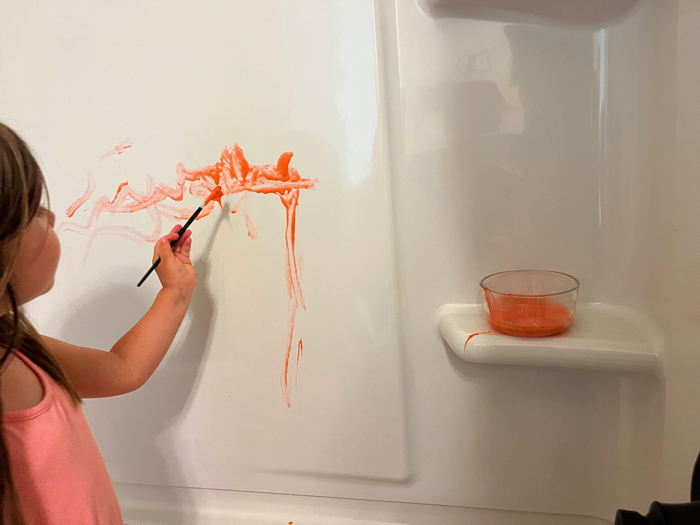
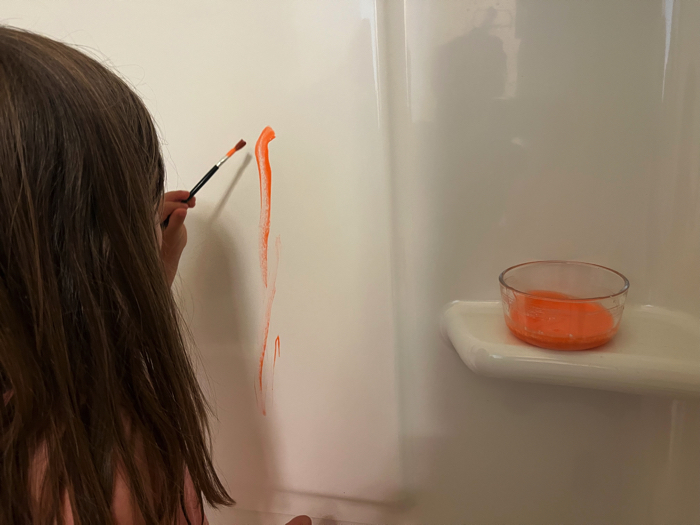
My kids love to be able to paint all over the walls of the tub. They’re always shocked that this is something mom gives the okay to. They also love the slimy texture of the paint on their fingers.
Since my kids go through a lot of bath paint, I wanted to find a DIY recipe to save us money. This recipe is not only inexpensive to make, it’s also simple enough for kids to help with! My kids helped me make this batch of bath paint and loved getting to pick the colors.
If you’re looking for a way to make bath time fun and educational, these DIY Bath Paints are for you. Follow along for this simple recipe that will become a household favorite.
DIY Bath Paints: What You’ll Need
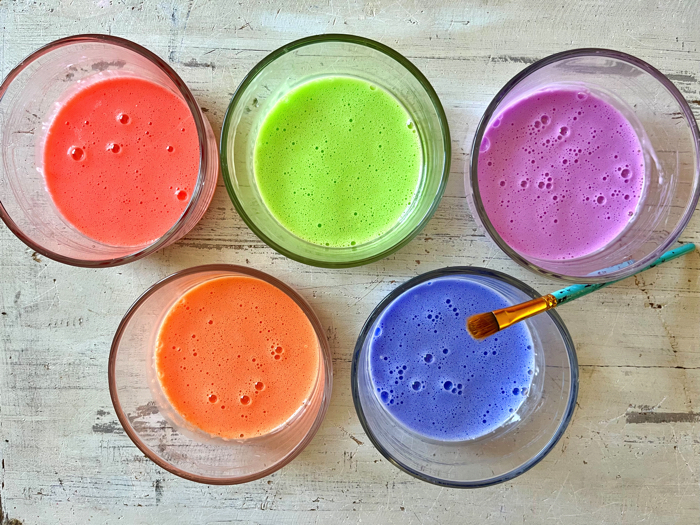
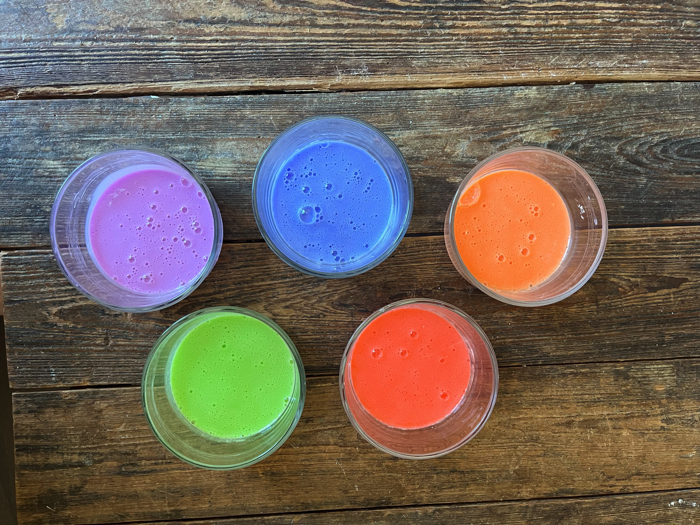
Instead of buying expensive bath paints that will only last a week, make your own for a fraction of the cost. We made over 30 oz of bath paints for just $4!
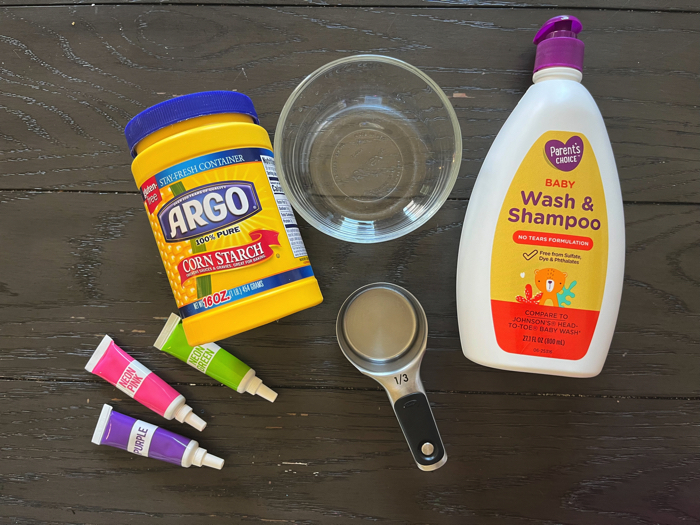
Here are the only ingredients you’ll need to make a batch of bath paints.
Materials:
- Baby shampoo
- Cornstarch
- Food Coloring
- Water
How to Make DIY Bath Paints
To whip up these bath paints, follow these simple steps.
Step 1: Measure Out Shampoo
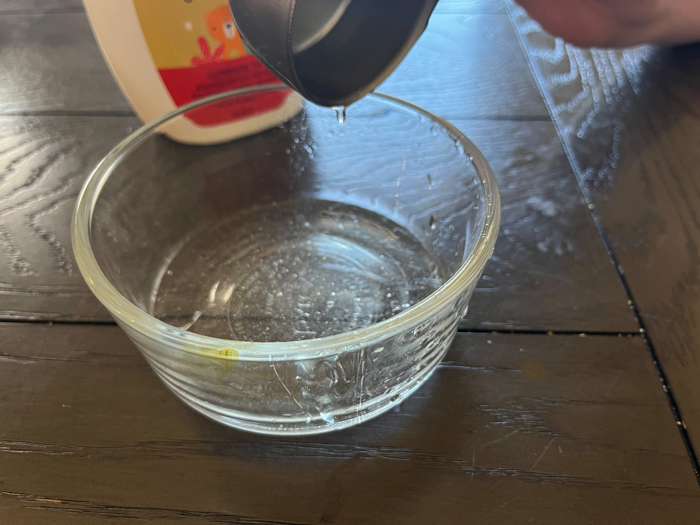
You’ll want to decide how many containers of bath paints to make. We bought a 27 oz shampoo bottle and decided to divide that by nine. This is about ⅓ cup for each serving.
I didn’t want to make all nine containers at once, so I used only about half the bottle. For each paint color, measure 1 ⅓ cups of shampoo into a mixing bowl.
Step 2: Add Cornstarch
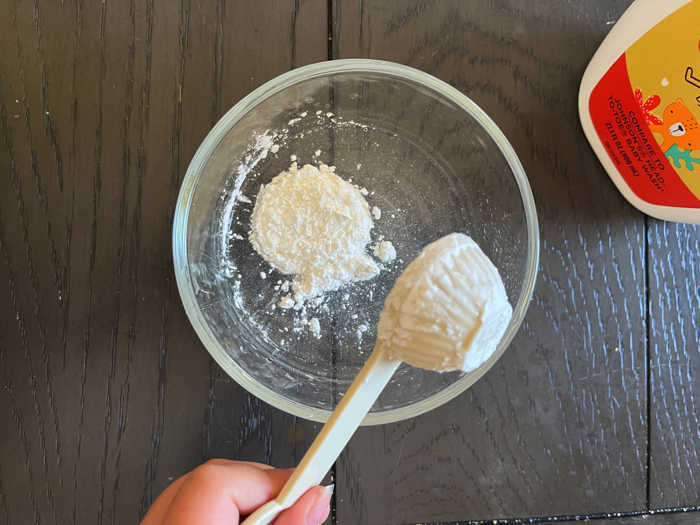
We found that using a 2:1 ratio of shampoo to cornstarch was perfect. Since we used 1 ⅓ cups of shampoo, we needed ⅔ cup of cornstarch.
The cornstarch thickens the shampoo and makes it more opaque. Feel free to adjust the amount if desired.
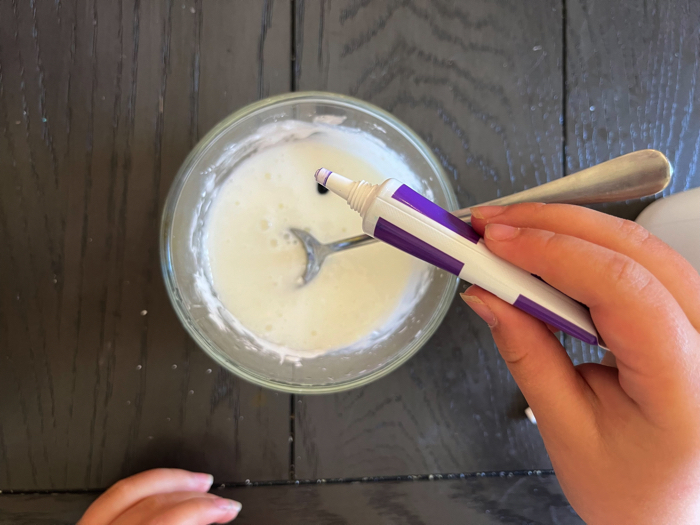
Step 3: Mix Thoroughly
Your child will likely want to help with this step. There’s something satisfying about watching the cornstarch mix into the shampoo. Your child might even want to test it with their fingers.
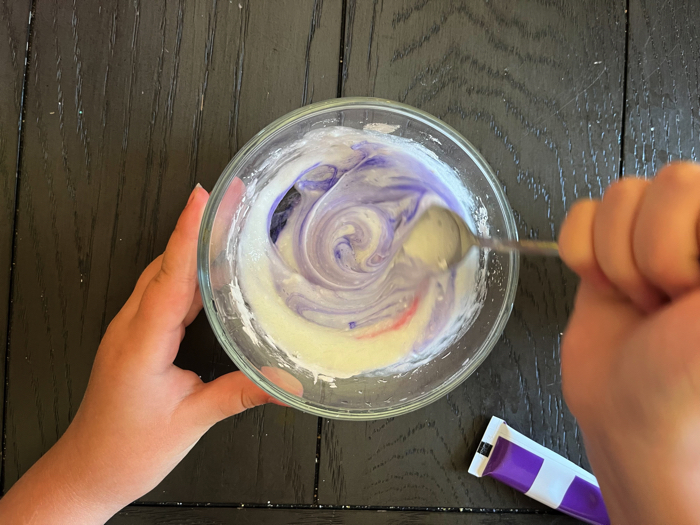
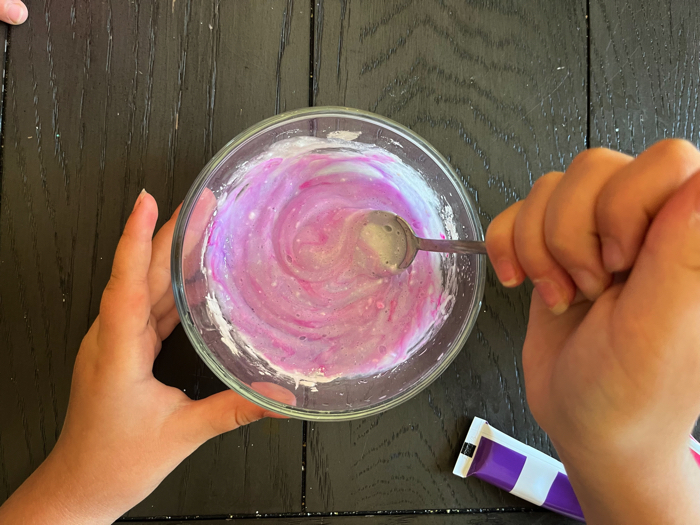
Step 4: Add Food Coloring
You can use gel or liquid food coloring. Start with only a few drops and stir before adding more.
When you reach the desired color, store the paint in an airtight container until you’re ready to use it. You’ll want to stir the mixture again each time you use it, as it will likely separate.
Time to Play
Your child will love getting to use the new paints at bathtime. As your child explores their DIY bath paints, you can encourage them to practice new skills. Using bath paints, you can create simple preschool literacy activities as well as fine motor and math activities.
Here are a few ideas to get you started:
Name Painting
Learning to spell and write your name is an important kindergarten readiness skill. Use bathtime to help your child master this skill.
Hand your child a paintbrush and show them how to form each letter of their name in the air. Next, write their name on the bathtub wall and have them copy the letters underneath with the brush and paints. If their full name is too overwhelming, just do one letter at a time.
Shape Formation
Young children often need much practice to master shape recognition. It’s normal for them to mix up names like rectangles and triangles. However, the more they practice, the more fluent these terms will become.
Using the bath paints, have your child form large shapes on the wall with their finger or a paintbrush. As they draw the shape, count the sides and name the shapes. If drawing the shapes is too hard for your child, you can draw them and have your child name them instead.
Color Mixing
The process of making new colors is often exciting for young children. When you mix blue and yellow and somehow end up with green, it’s almost like magic. Bath paints are the perfect tool for teaching your child about primary and secondary colors.
Have your child create a paint palette on the bathtub wall. Add a small amount of each color in a circle and leave the middle open for mixing. Encourage your child to take dabs of different colors and mix them to see what colors they make.
CVC Word Formation
We love using everyday toys and materials to sneak in CVC word practice. Like with our Alphabet Train Activity, these bath paints are a simple way for children to practice words like cat, map, tan, etc. Reading words that follow this pattern builds confidence in beginning readers.
Using the bath paints, call out a CVC word for your child to write on the wall. Be sure to sound out each letter individually and then all together. This will help your child recognize the beginning, middle, and ending sounds.
Painting Toys for Fine Motor Practice
One of my kids’ favorite ways to use bath paints is to paint their toys. Using a paintbrush, they’ll paint on miniature animals, bathtub baby doll faces, or toy boats. All the paints wash right off in the water, so they won’t ruin their toys.
This activity may seem like it has little educational value. However, painting helps a child strengthen their pincer grasp and build fine motor skills. Painting practice builds the muscles needed for writing, tying shoes, and more.
Nail Salon
We have a house full of girls, so this activity is a popular choice. Natural nail polish is messy and can stain clothing, but bath paint is a safe option. My three and six-year-olds both love to play nail salon in the tub with bath paints.
Using small paintbrushes, they take turns playing the nail technician and the customer. This also gives them a chance to get creative and play with color patterns.
What Can I Use Instead of Cornstarch?
If you don’t have cornstarch on hand, don’t worry. There are plenty of other ways to make DIY bath paints. For starters, you can replace cornstarch with regular flour, arrowroot starch, or tapioca starch.
If you don’t have any of those items on hand, shaving cream can be used as an instant bath paint. Just combine food coloring with the shaving cream and let your child paint away. Note: Make sure your child knows not to get the shaving cream near their eyes, as it would likely sting.
How else can I use these ingredients?
While making these bath paints, I was reminded of several science experiments for preschoolers from my teaching days. One of my favorite experiments was making “Oobleck.”
For an easy Oobleck recipe, mix 1 ½ cups of cornstarch with 1 cup of water. What’s extra fun about Oobleck is that it’s firm when you push down on it but liquidy when you pick it up. You might also want to read Bartholomew and the Oobleck by Dr. Seuss.
What Are the Benefits of Playing With DIY Bath Paints?
DIY bath paints are not only fun, they’re beneficial for childhood development. Here are just a few ways these paint can help your child:
Builds Fine Motor Skills
Fine motor activities for preschoolers help children get ready for kindergarten. Fine motor skills will be necessary for writing their name, zipping up their backpack, and cutting paper. The only way to strengthen these muscles is by using them consistently.
When your child holds the paintbrush with their fingers and smears the paint across the tub, they use those small muscles. The more they paint in the tub, the easier those pinching and pushing motions will become.
Provides Sensory Exploration
Many parents are unaware of the great benefits of sensory explorations. Your child learns about the world around them through sensory input. When you offer new sensory input, your child forms connections in their brain and they begin to grow in knowledge.
Offering items like bathpaints, playdough, slime, or unicorn sensory rice provides tactile input. Most children love to feel different textures and experiment with how the materials move.
Calms Emotions
We love using calming baths to help resolve sensory meltdowns. Add some lavender Epsom salts in a tub with these DIY bath paints for a calm-down activity for any age. The gentle motion of sweeping with a paintbrush helps distract children so they can regulate their emotions.
What Other Ways Can I Enrich This Activity?
- Jorden, Brooke (Author)
- English (Publication Language)
- 16 Pages – 09/17/2018 (Publication Date) – Familius (Publisher)
To continue the fun, try one of these bathtime activities
- Use Fizzy Color Changing Tablets to color the bath water
- Use Bath Stickers for creative storytelling and pretend play
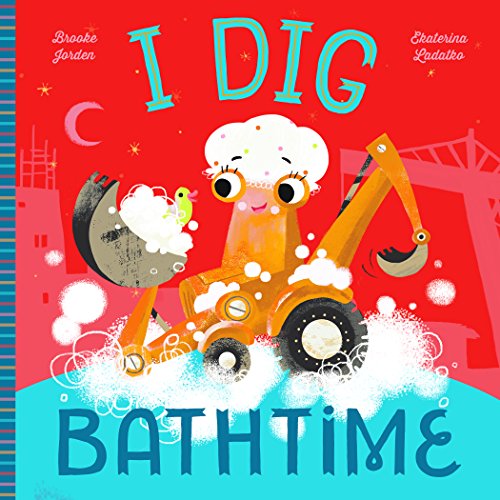
- Read the book I Dig Bathtime by Brooke Jorden
Related Posts

Braille and Literacy, Music Play, Special Needs, Visual Impairment
Braille needs allies. Music can be one of them.
An inspiring look at how music can support Braille literacy, creativity, and inclusion for blind children.

Tactile Arts and Crafts, Visual Impairment
What Does Art Feel Like? A Guide to Tactile Creativity for Blind Children
Discover how blind children explore art through touch. Learn practical ways to support tactile creativity, build early Braille literacy, and nurture imagination with hands-on projects, textures, and accessible art experiences.

Holiday Crafts and Ideas
Sensory Pumpkin Decorating for Kids Who Are Blind
Create a sensory pumpkin with yarn, buttons, and fabric! A fun, non-carving fall craft for blind kids that builds tactile and fine motor skills.